


HAPPY HOLIDAYS!! I love celebrating Christmas and decorating with handmade primitive crafts. I love the rustic appearance, which adds to the charm of the craft items. This Christmas I wanted to create my very own "Charlie Brown" Tree, with a Country, Grubby look. "Grubby" is another word for primitive crafts that look aged, old or dirty.
My "Charlie Brown" tree was created using Artificial Pine Greenery, a Wooden Spoon and a "Grubby" Mason Jar Base. I embellished the tree with Berries, Metal Stars, Star Anise, and Rusty Bells. I rusted my bells following Primitive Folk Art tutorial.
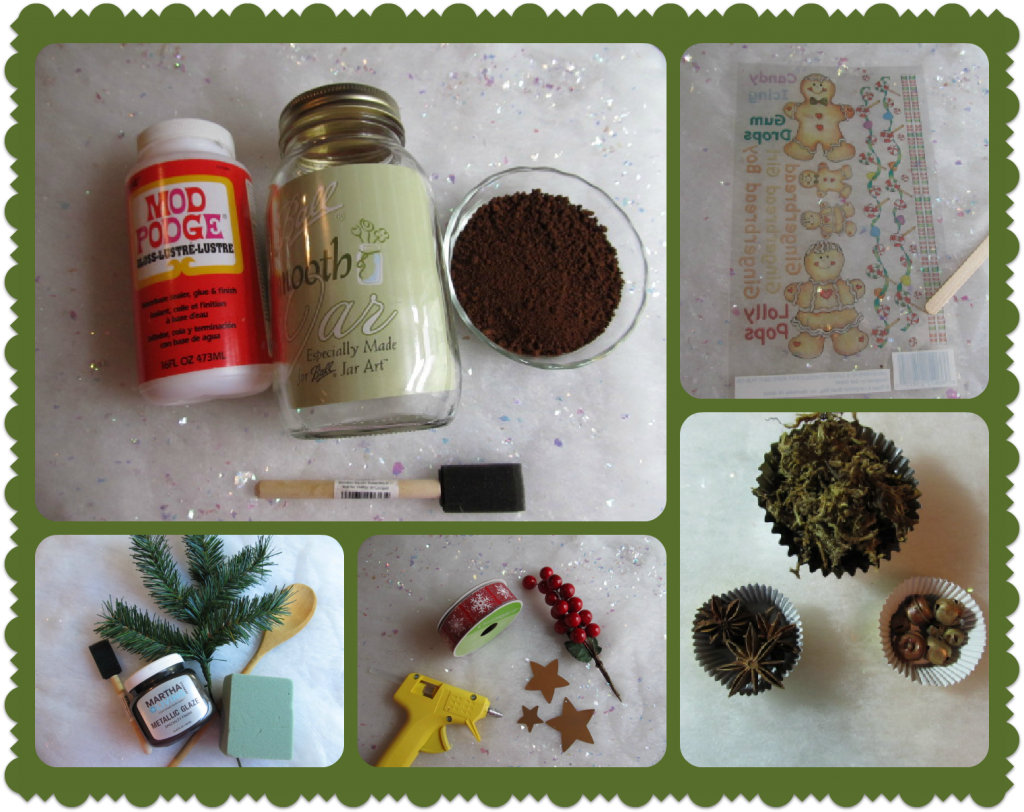
To begin, I gathered the following materials:
- Mason Jar
- Mod Podge
- Instant Coffee Granules
- Foam Brush
- Rub-On Transfers
- Artificial Pine Greenery
- Wooden Spoon
- Martha Stewart's Metallic Glaze in Black Coffee
- Floral Foam Block - $1.00 Dollar Tree
- Berry Stem
- 7/8" Christmas Ribbon
- Hot Glue/Sticks
- Golden Metal Stars
- Star Anise
- Floral Moss
- Rusty Bells
- Glitter
- Wire Cutter
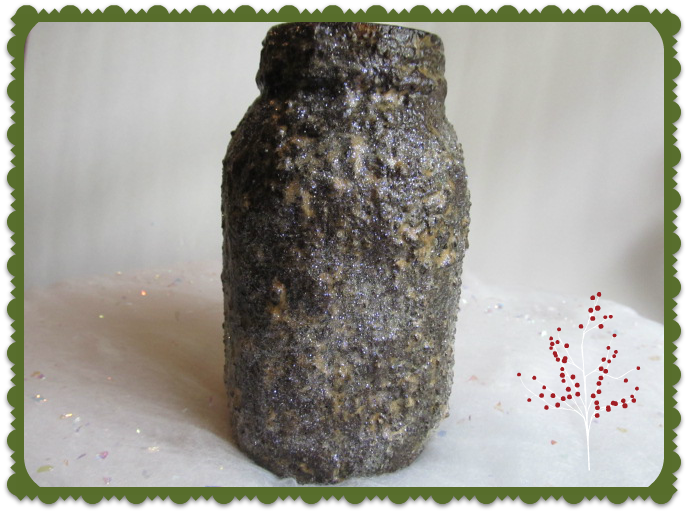
- Pour Coffee Granules into a large plate.
- Working in sections, apply Mod Podge to Jar
- Roll Jar into the Coffee Granules until jar is completely covered
- Let dry overnight and repeat process 4-5 times
- Please note: some of the coffee granules will fall off and/or melt.
- When you are happy with the jar's look, apply a final coat of Mod Podge and sprinkle glitter all over the jar. Let dry completely
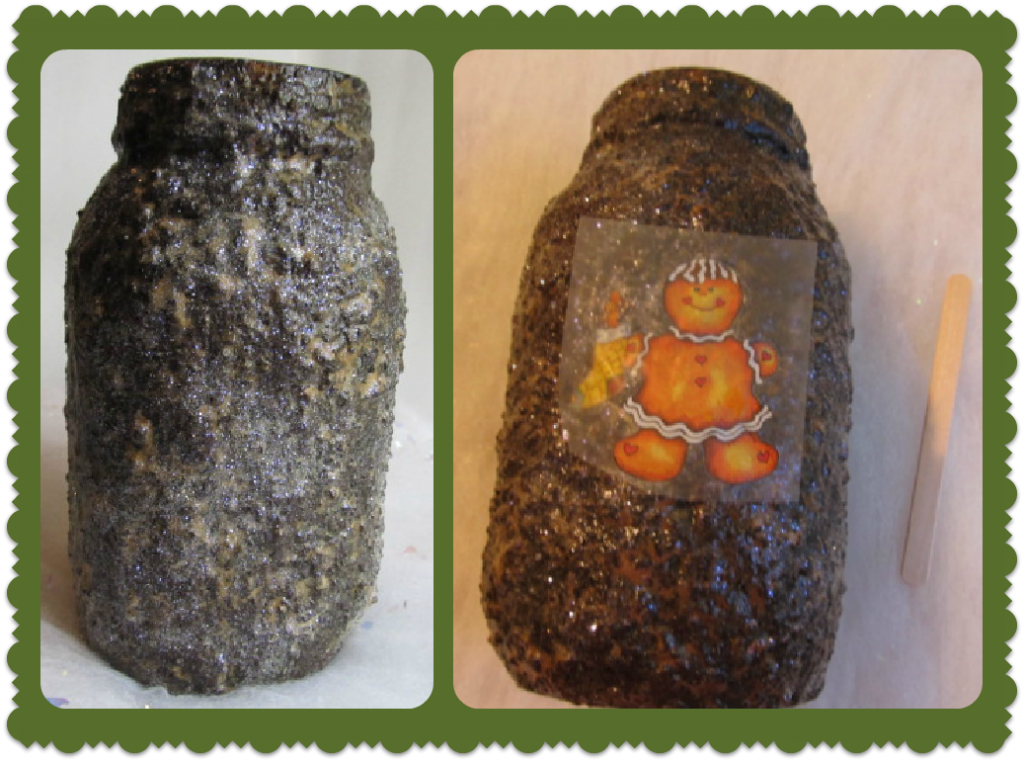
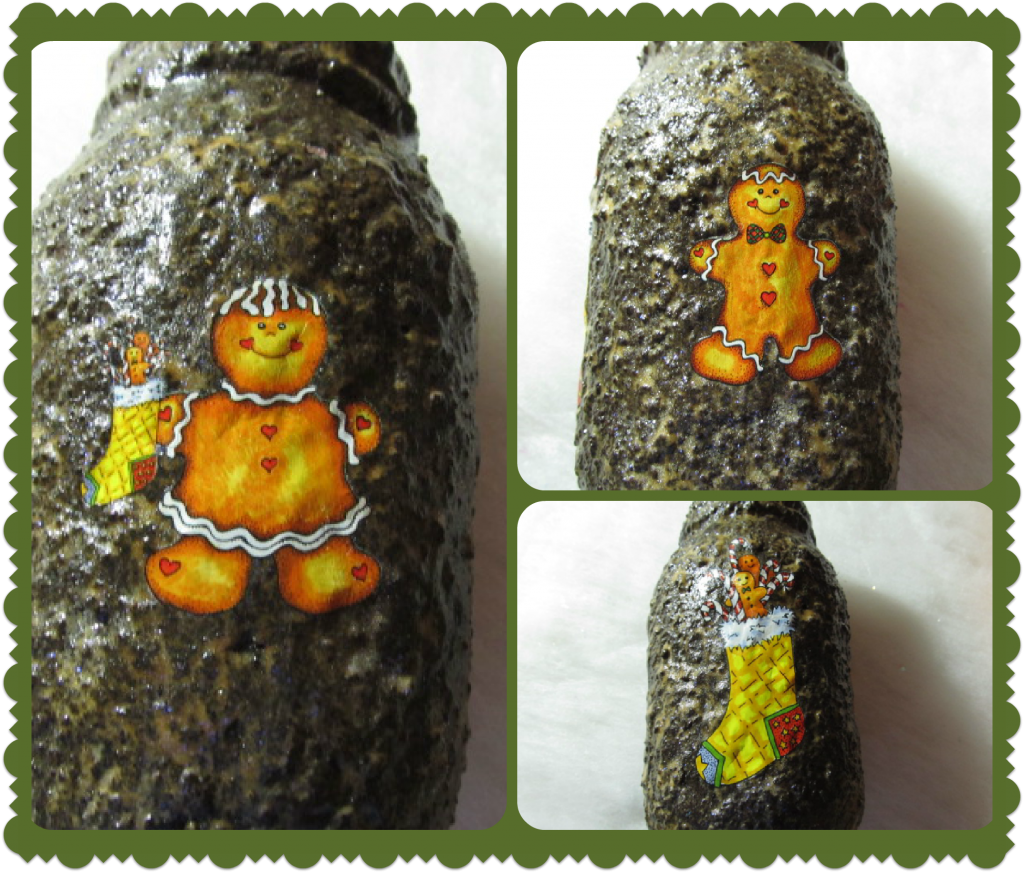
- Following Rub-On directions; apply Rub-On transfers to Jar. I decided to add Gingerbread men on each side of the jar, plus a Christmas stocking in the back.
- The Jar's surface will be rough. Therefore, take your time transferring the rub-ons.
- Apply a coat of Mod Podge all over the jar to seal the rub-on transfers.
- Paint the Wooden Spoon with the Metallic Glaze. Let dry completely.
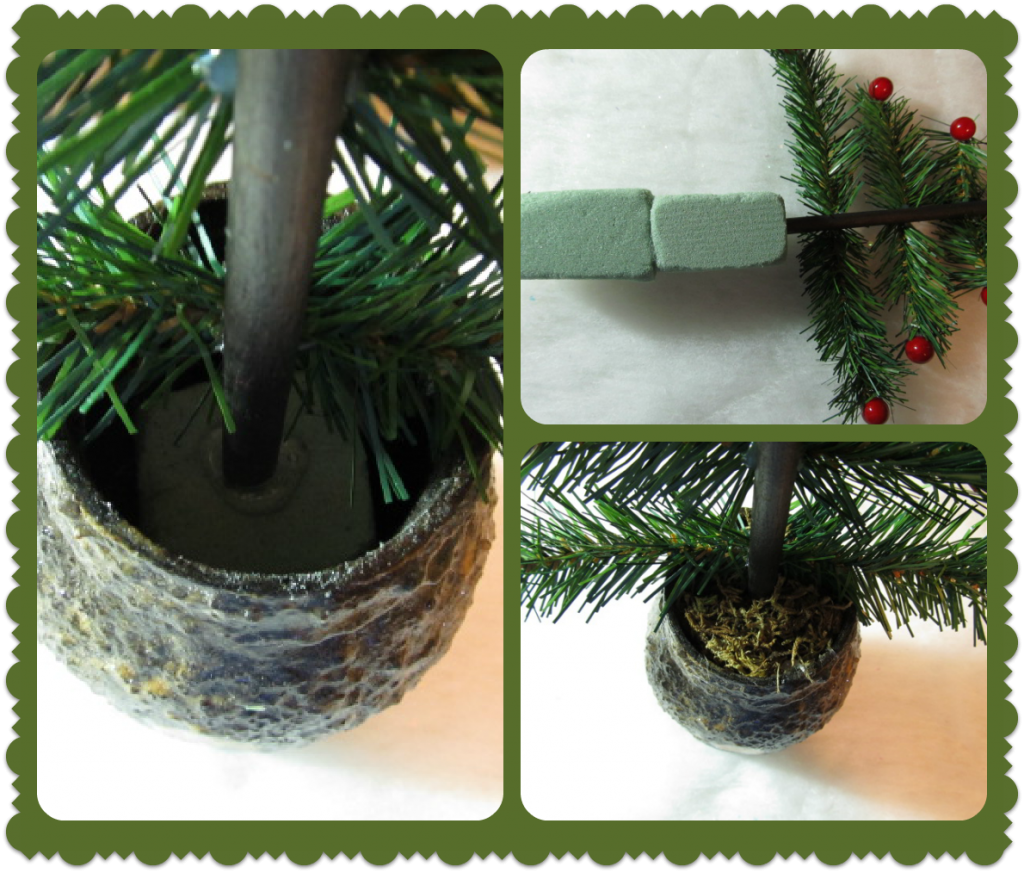
- Cut floral foam block in half. Glue the two halves together vertically.
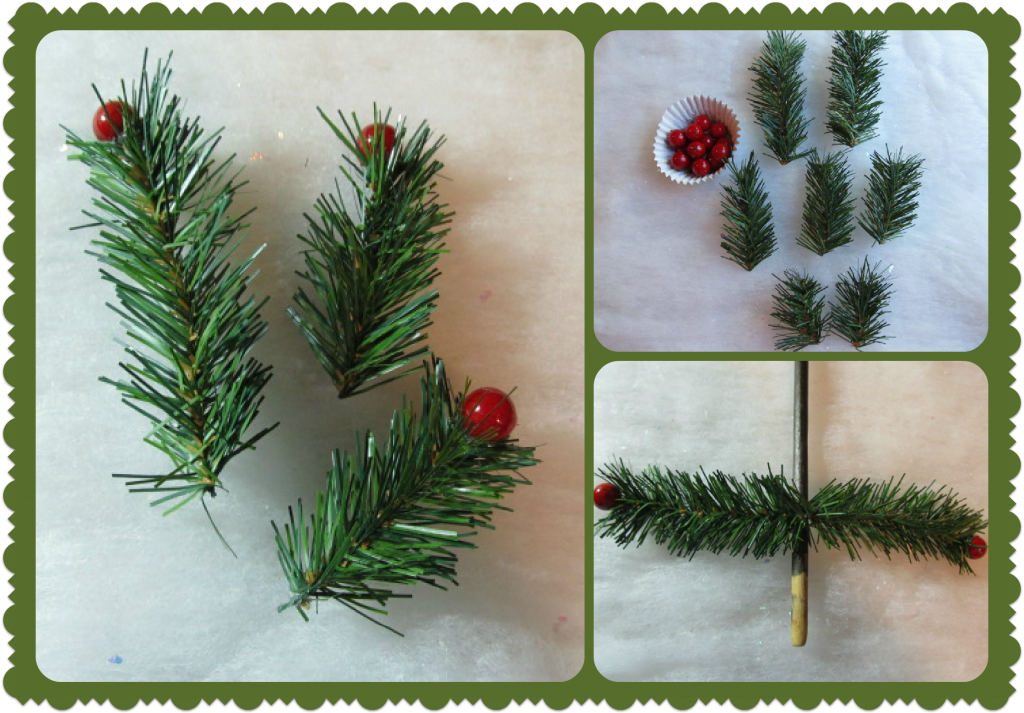
- Using the wire cutter; cut two 4", three 3" and 2" length of greenery.
- Snip the berries close to the stem.
- Glue a berry to one end of each greenery lengths, except for one of the 3" length, which will need a berry at both ends.
- Beginning 3" from the spoon's bottom, start forming your tree by gluing the 4" lengths opposite each other.
- Continue adding two - 3" lengths spacing 1 1/2" from the 4" lengths. Add two - 2" lengths spacing 1 1/2" from the 3" lengths. Add your final 3" length with the two berries.
- Insert and glue spoon bottom into foam. Add glue to foam's bottom and insert inside jar. Glue Floral Moss to Jar's top to cover foam.
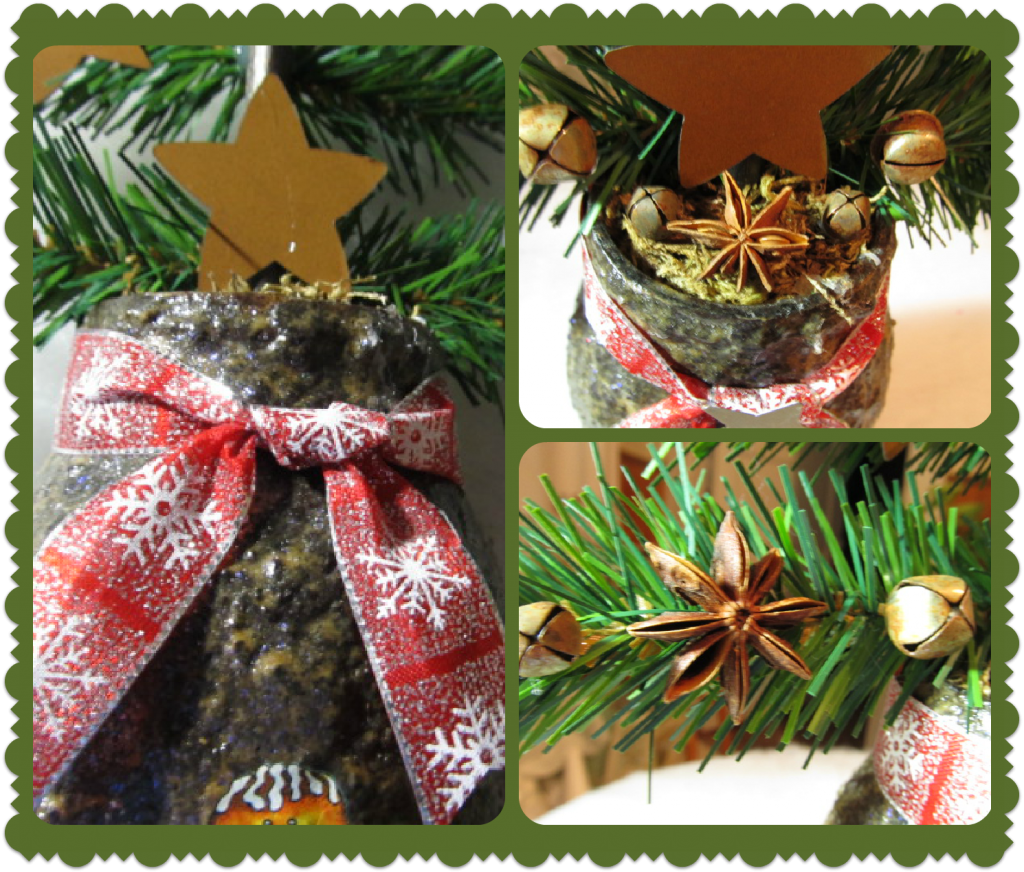
- Begin embellishing your tree. Glue stars, rusty bells and Star Anise to the tree branches and spoon's bowl. Add the ribbon to the jar's mouth and embellish as desired.


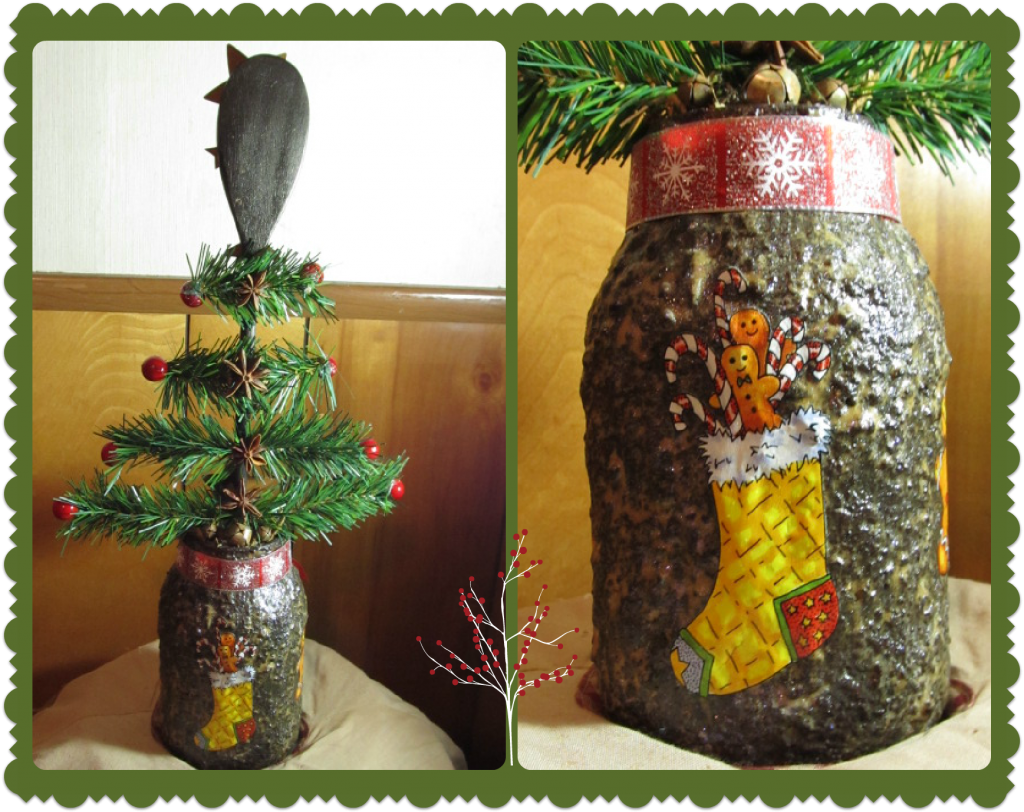
I love how my "Charlie Brown Tree" turned out. The Grubby Jar adds a rustic primitive look to the tree. This Grubby Tree will add a country charm to my kitchen Christmas Decor.
Here is the back side of the tree and the Grubby Jar.
Merry Christmas!!!!

 |  |
 |  |
 |


This is fantastic. I love it! So cute with the wooden spoon in there.
ReplyDeleteYour tree is adorable! I love it. Thank you so much for sharing at A Bouquet of Talent. Wishing you and your family a very Blessed and Merry Christmas!!
ReplyDeleteKathy
I love this and the texture on the mason jar is so unique! It's too adorable!
ReplyDeleteThat is too cute! Thanks for stopping by my blog and commenting!
ReplyDeleteLOVE this idea! Thanks for linking up to Every Day is an Occasion! Smiles, Jill
ReplyDelete